Christmas Trees Brownies
Posted on December 23, 2020
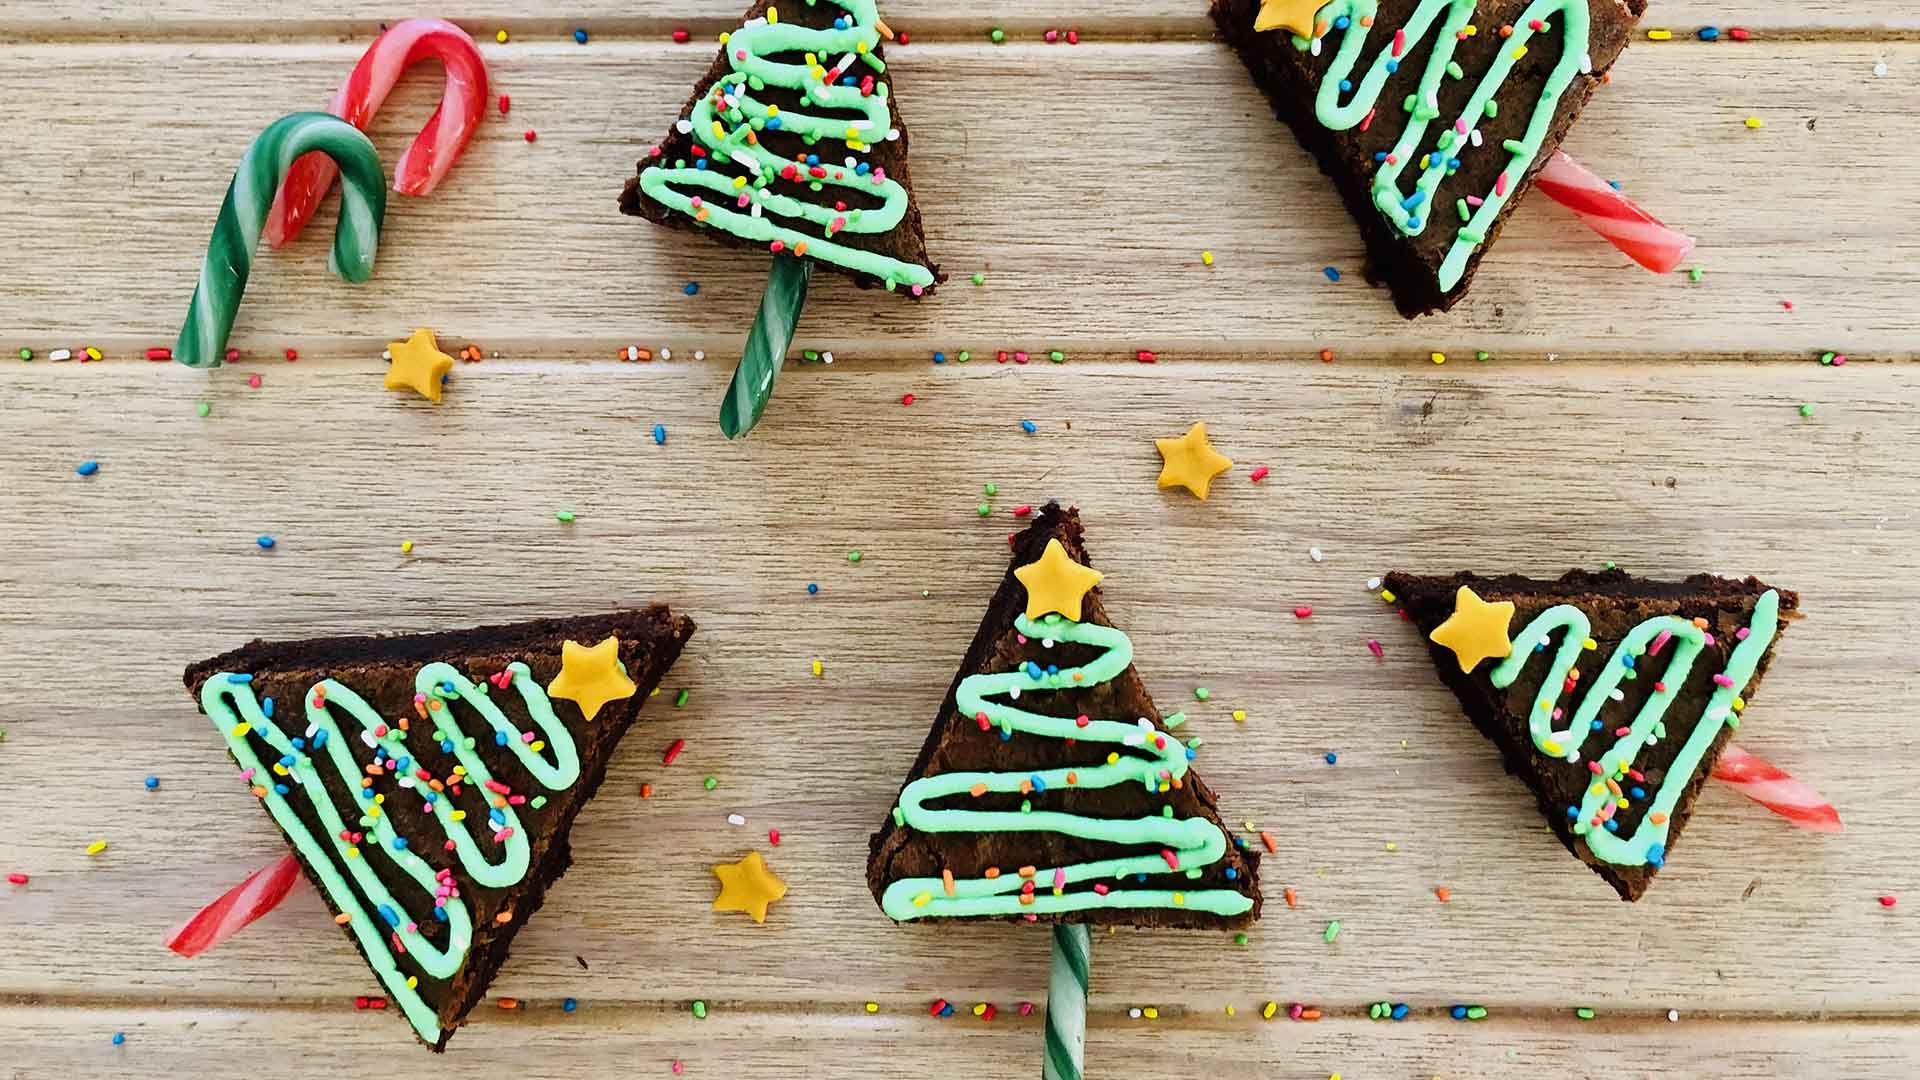
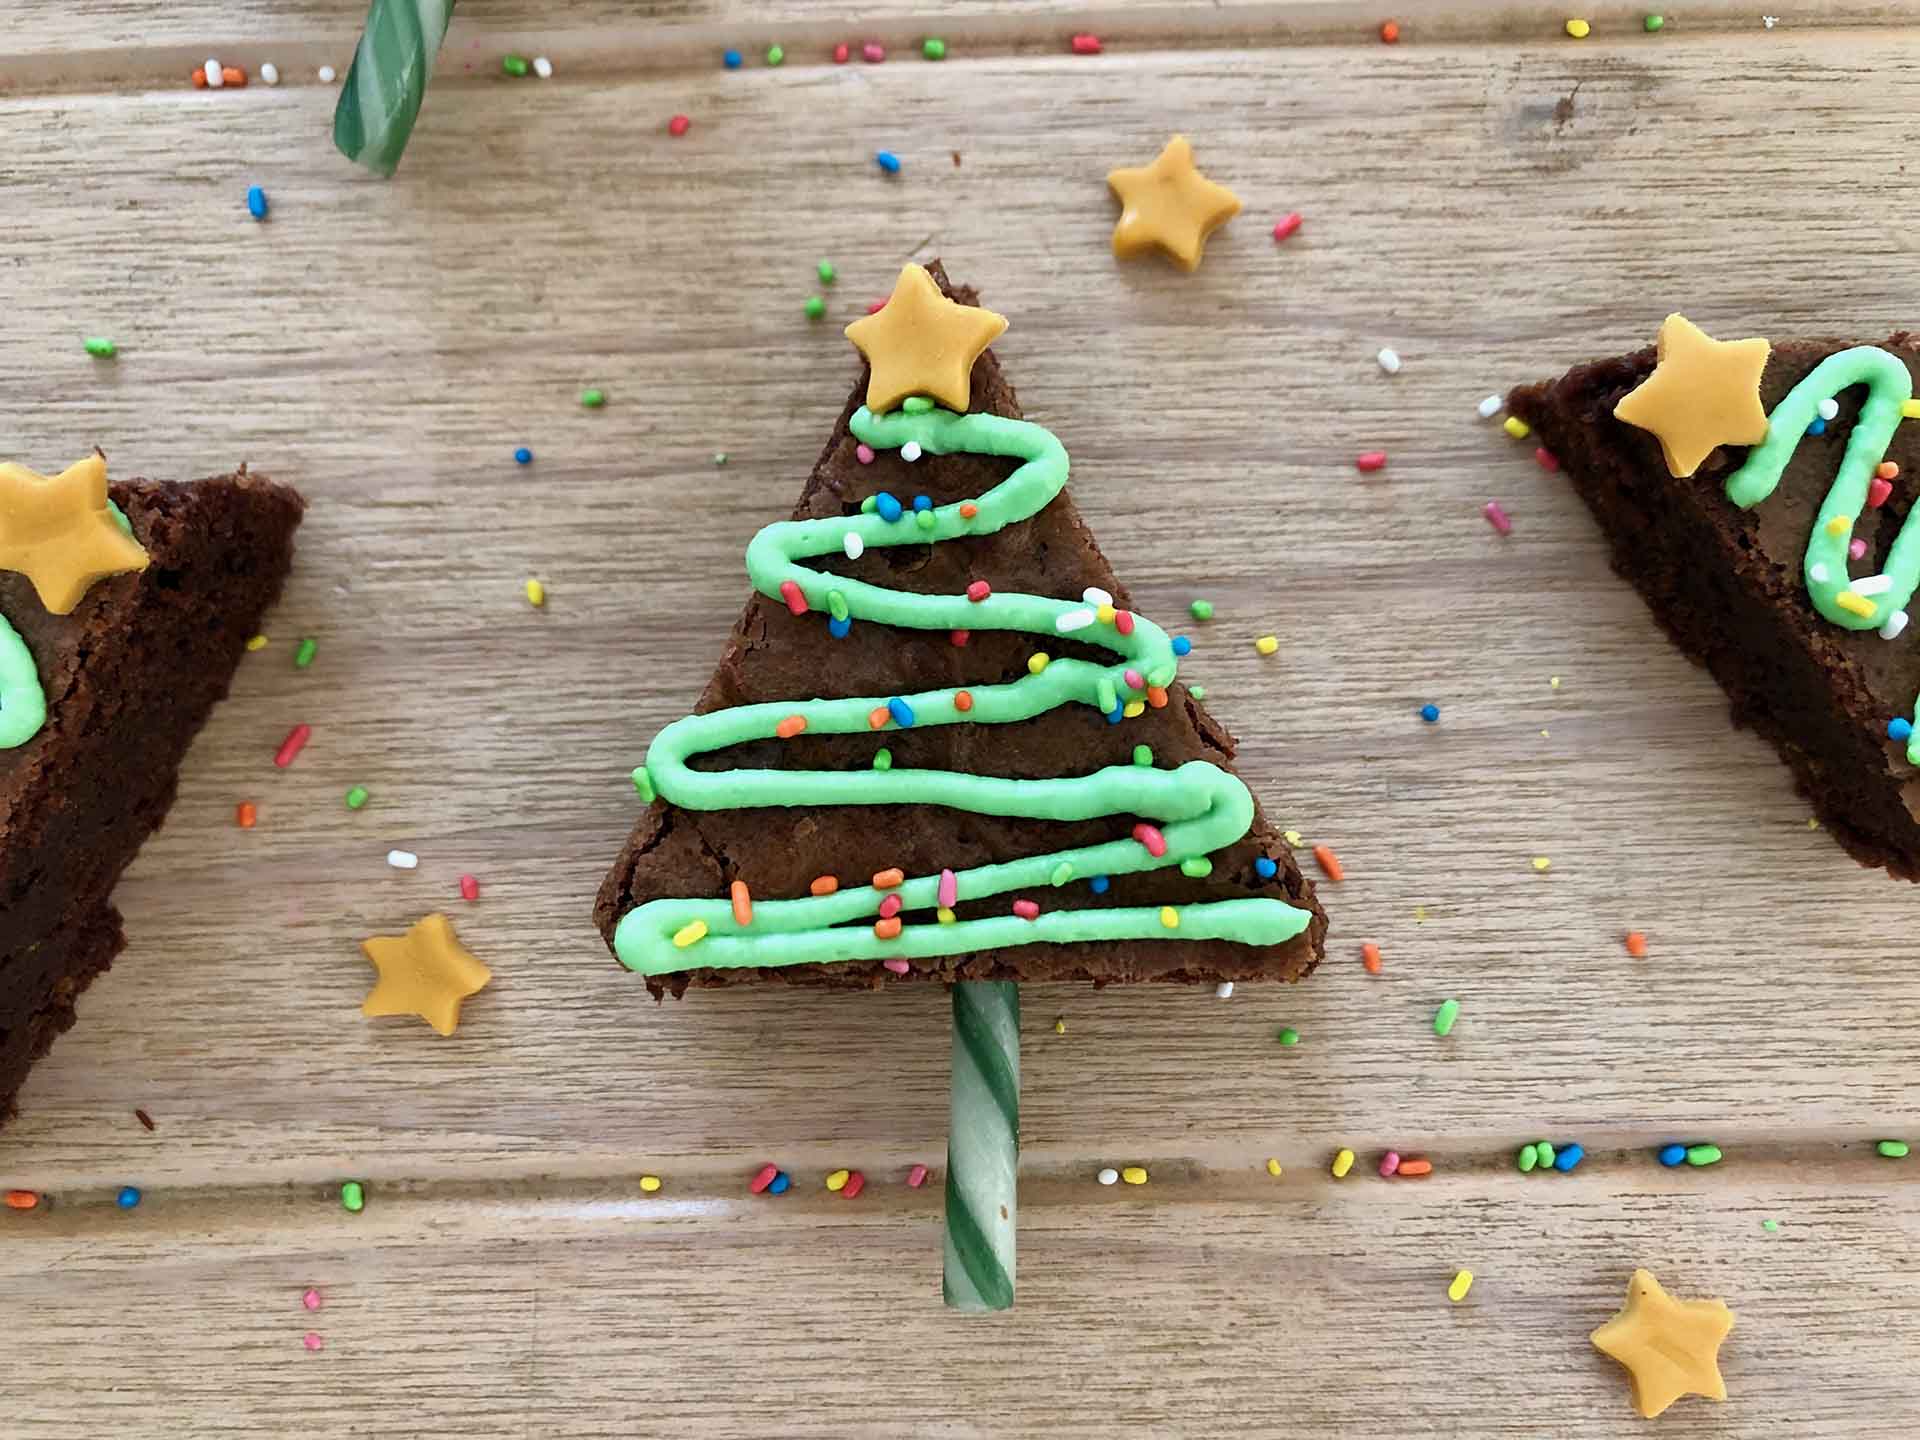
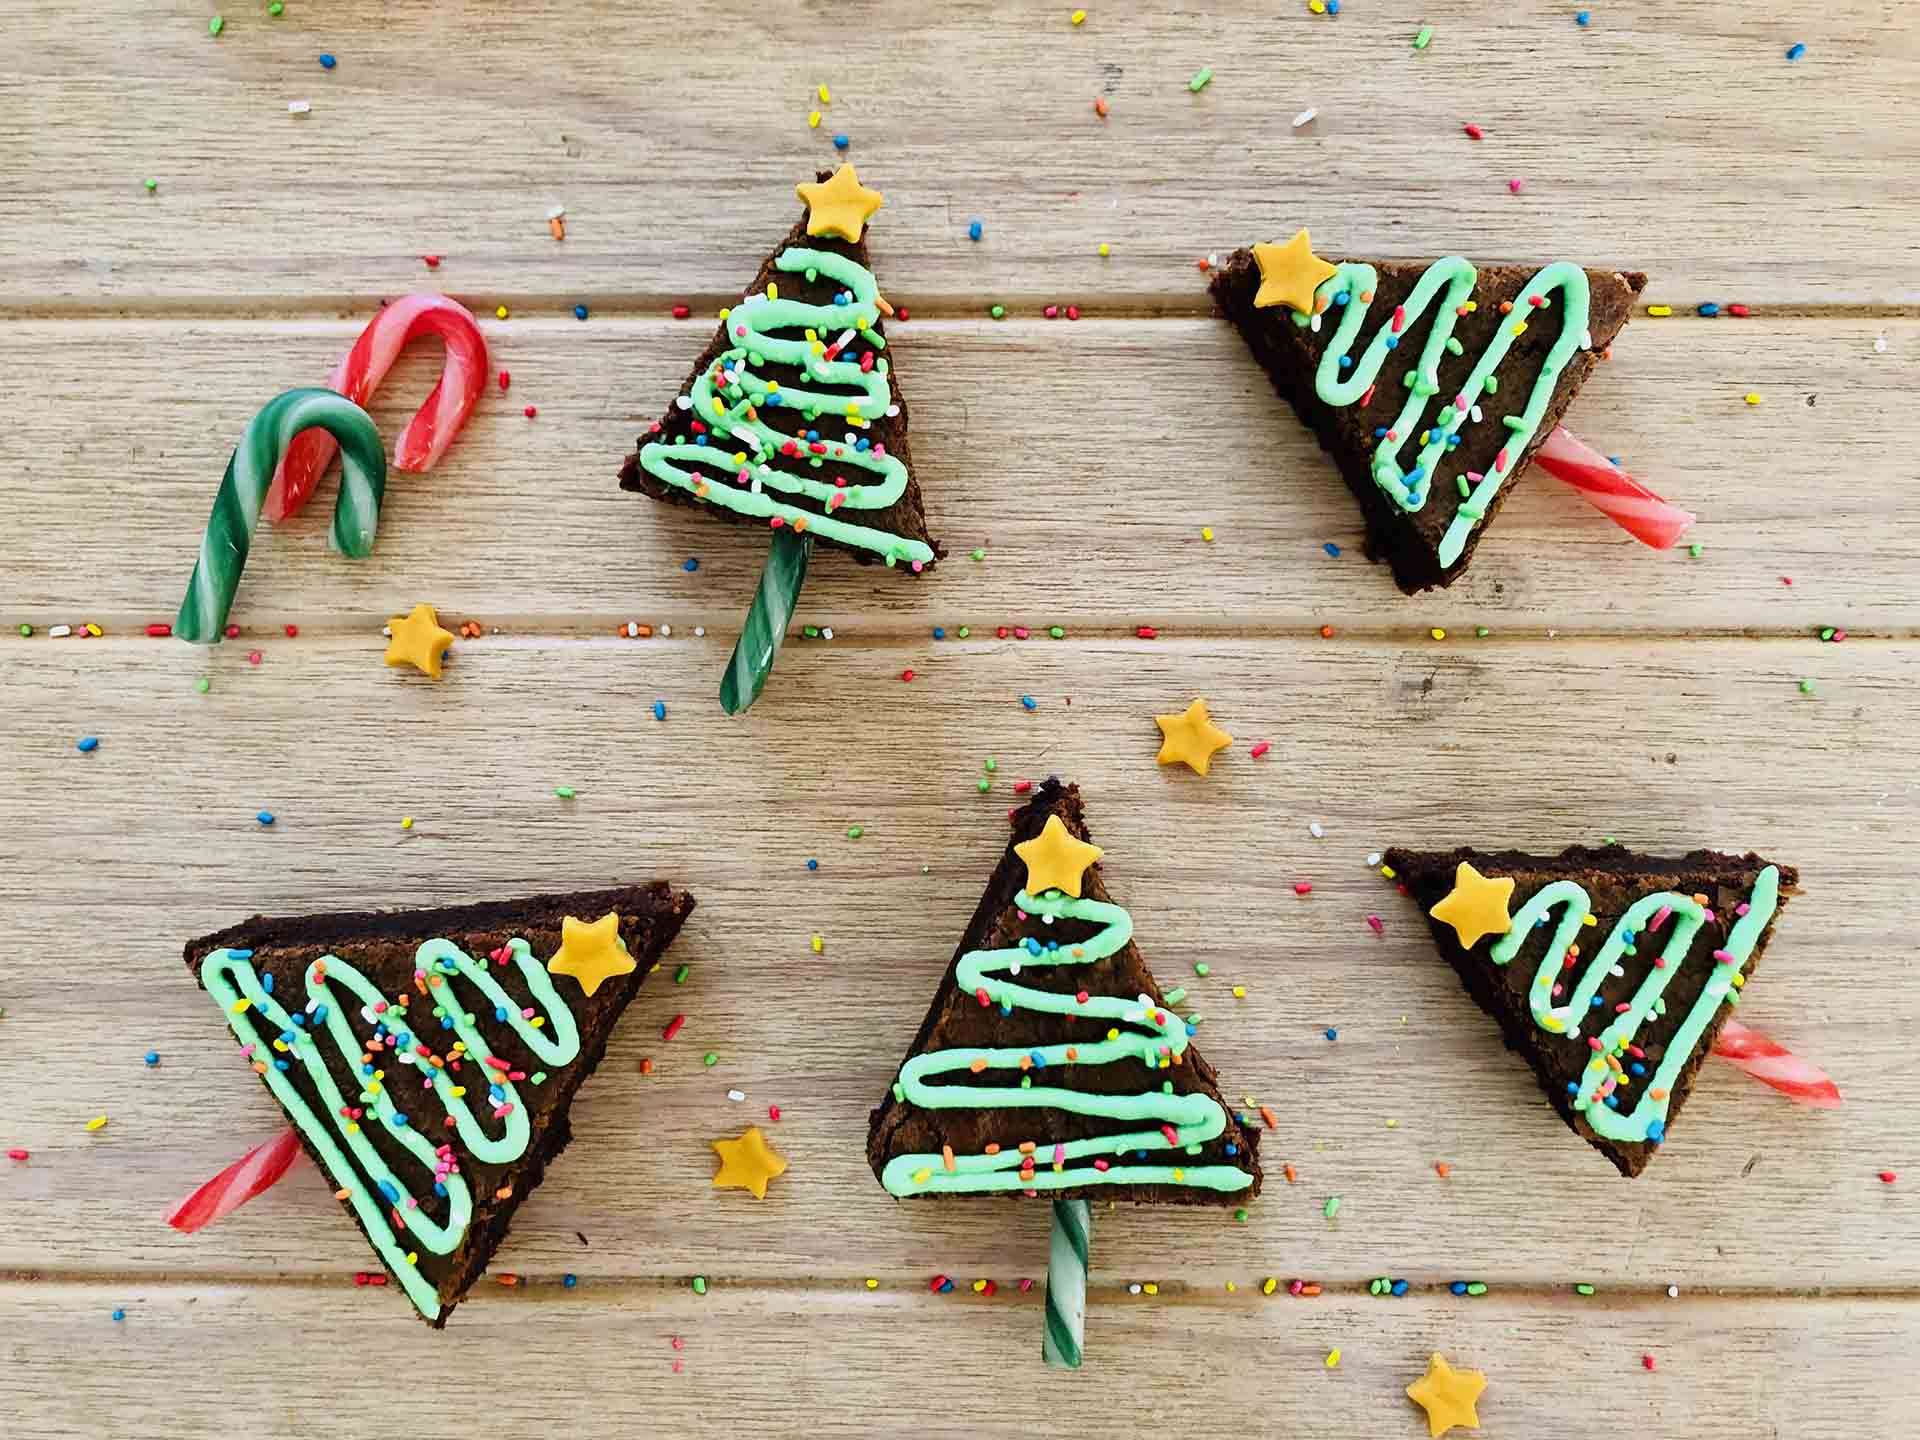
Really cute christmas tree chocolate brownies!! Bake your favourite fudgy brownies and convert them easily into cheerful christmas tree brownies! The kids will love them and get crazy! And you will enjoy your super chocolatey brownies along with a christmas spirit!
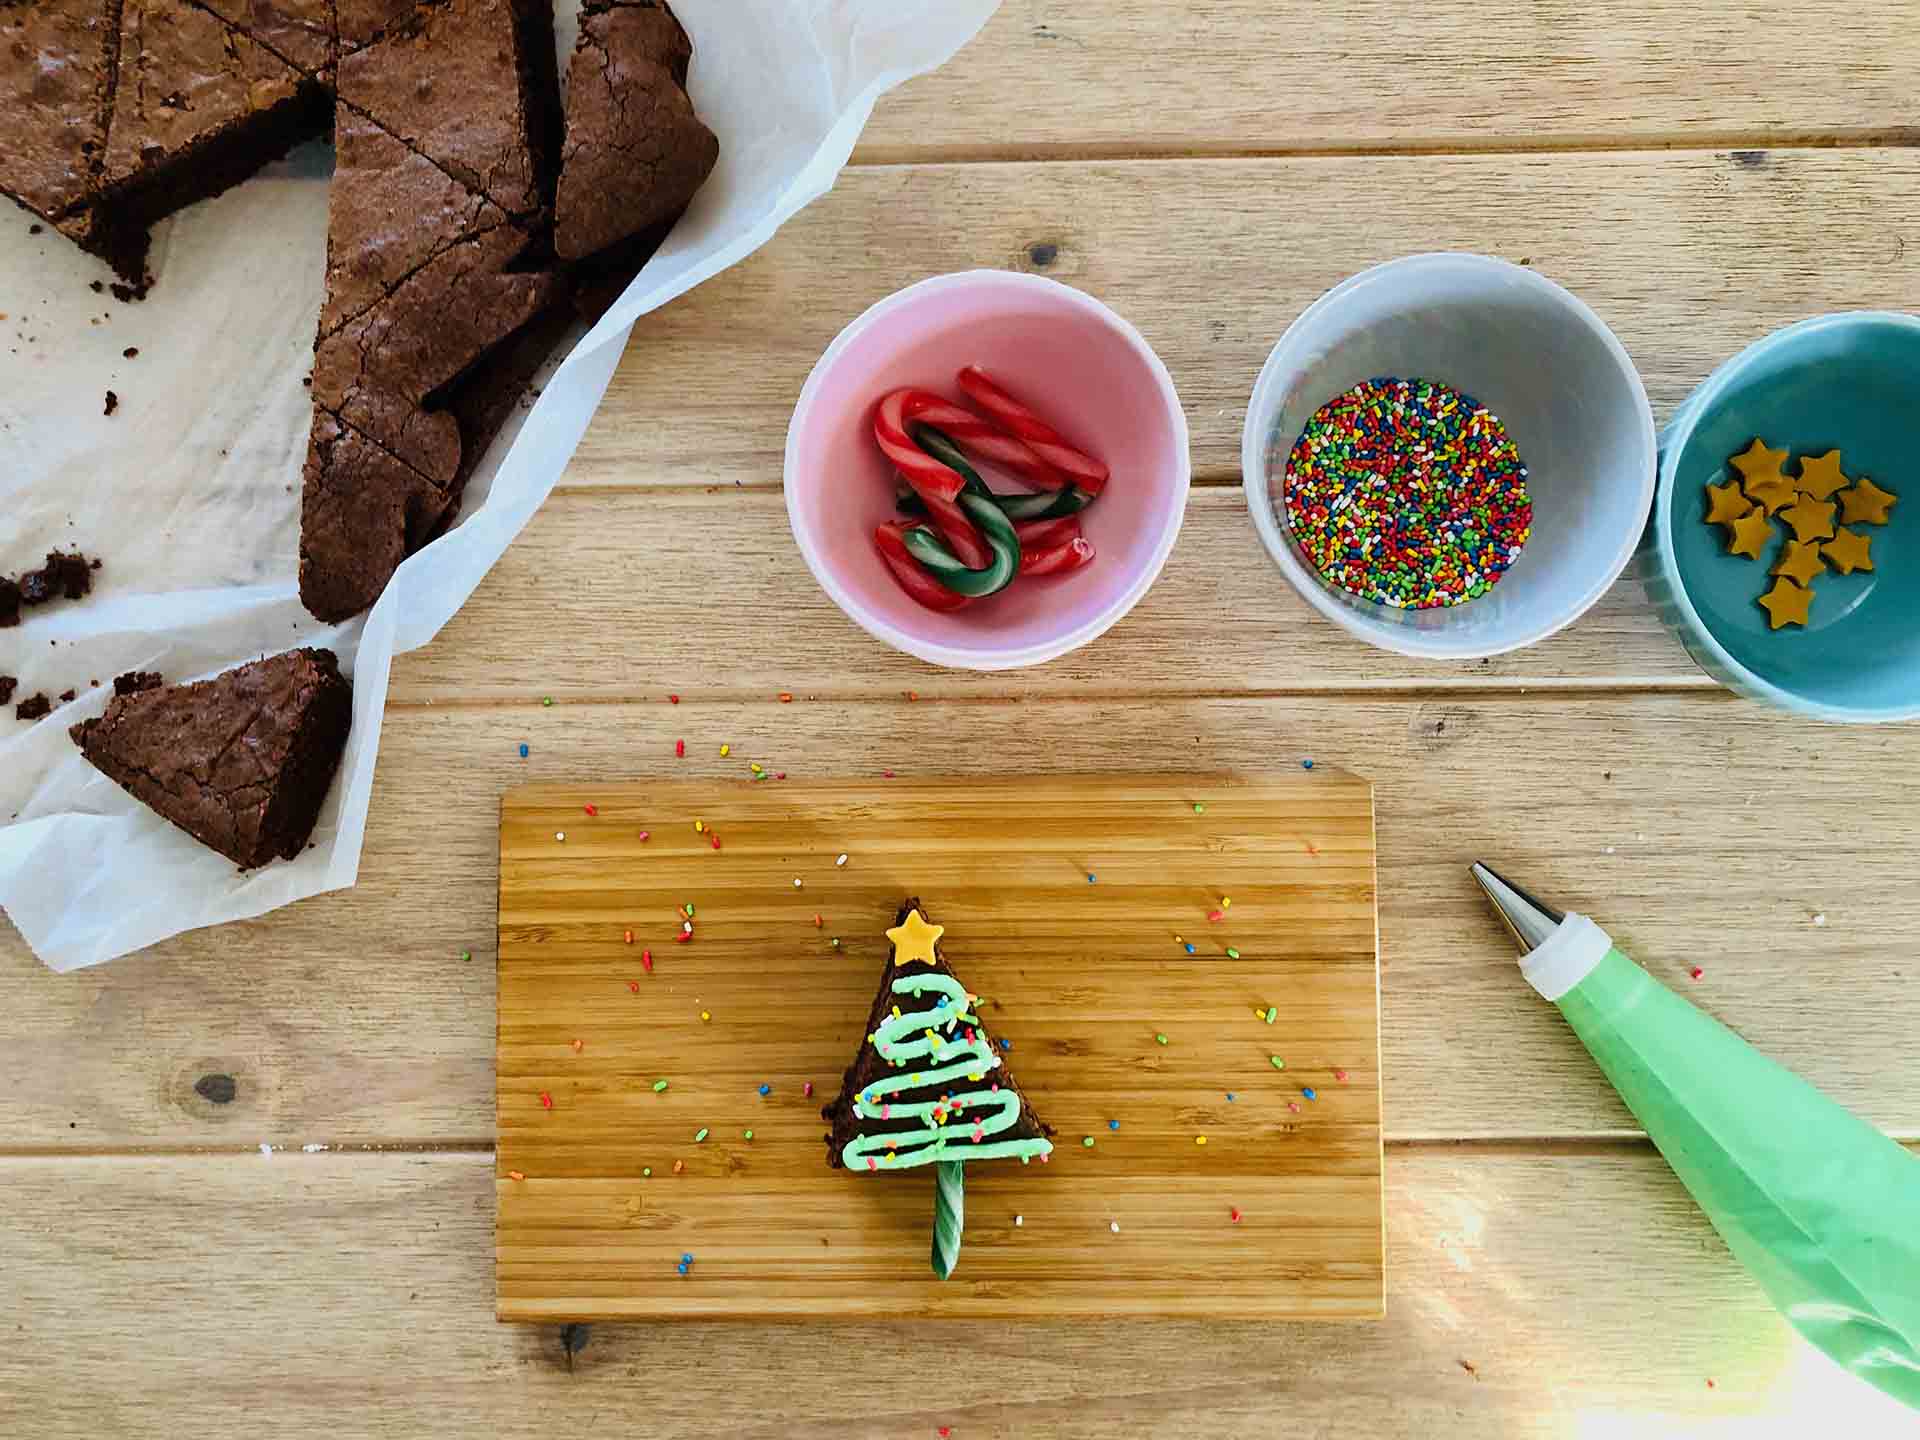
What else could be better for christmas, rather than your favourite brownies converted easily to happy and colorful little christmas trees? It is so easy to make and just make the kids crazy and their eyes to shine! To make these christmas tree brownies make your favourite square fudgy brownie recipe and make sure that it is not crumbling easily. You can make my favourite classic chocolate brownie or my almond butter brownies. Bake them and let them cool down at room temperature before cutting and starting decorating. For these christmas trees brownies choose my chocolate brownies and I added the orange zest of two oranges plus a teaspoon of cinnamon powder in order to bring the christmas flavor on! The frosting is a reach cream cheese frosting with just 3 ingredients: cream cheese, mascarpone cheese and confectioner's sugar. And of the decoration I needed candy canes for the tree trunk, fondant stars, that I made by myself and some sprinkles for ornaments.
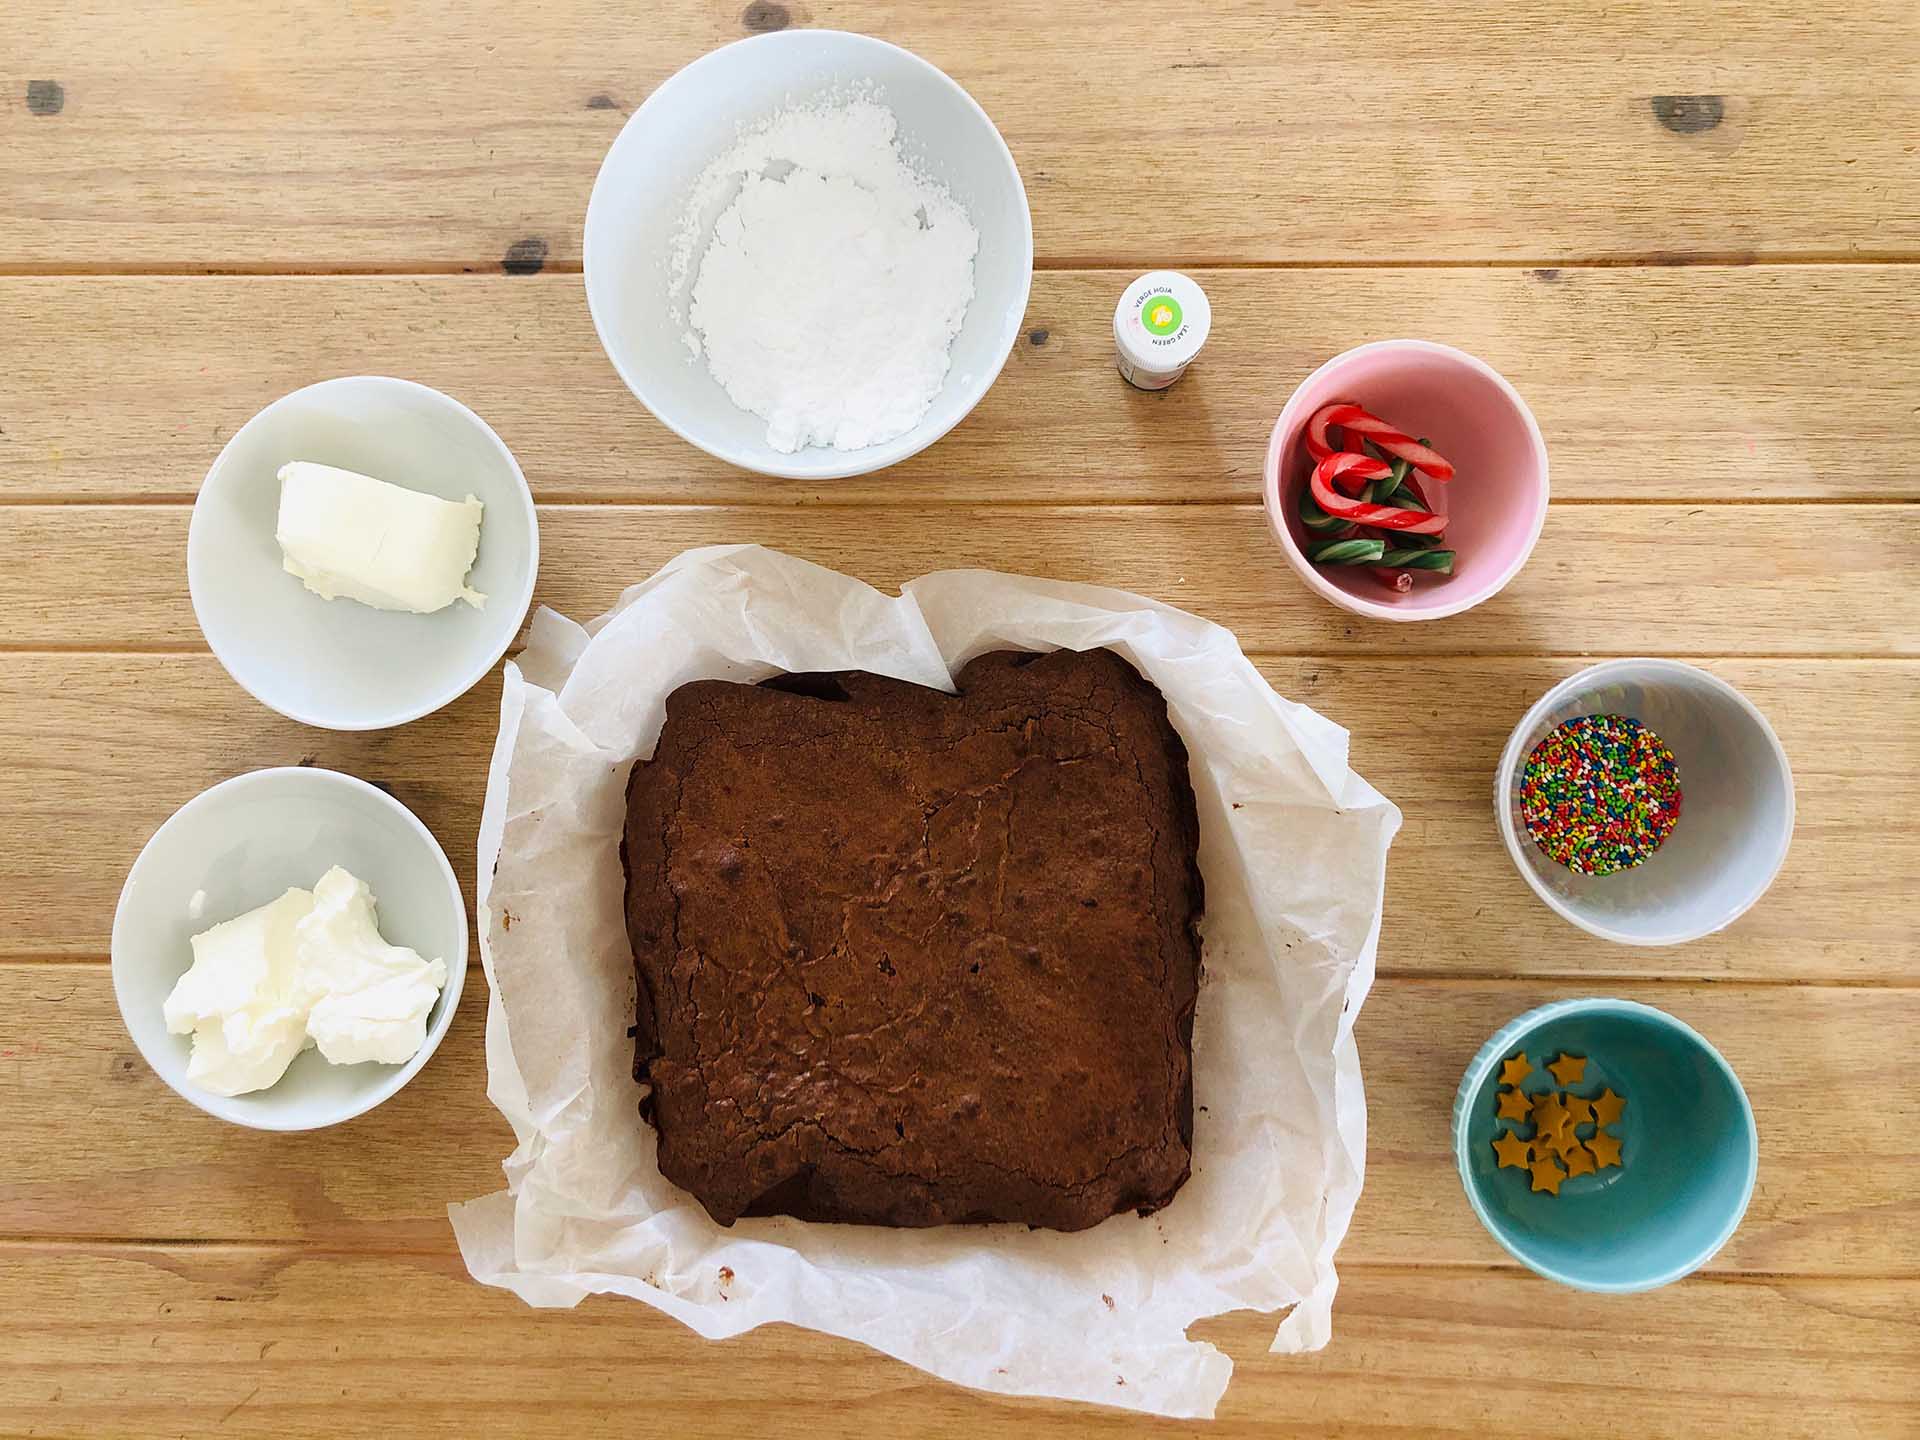

Hover over the image to see the ingredients
Tap on the image to see the ingredients
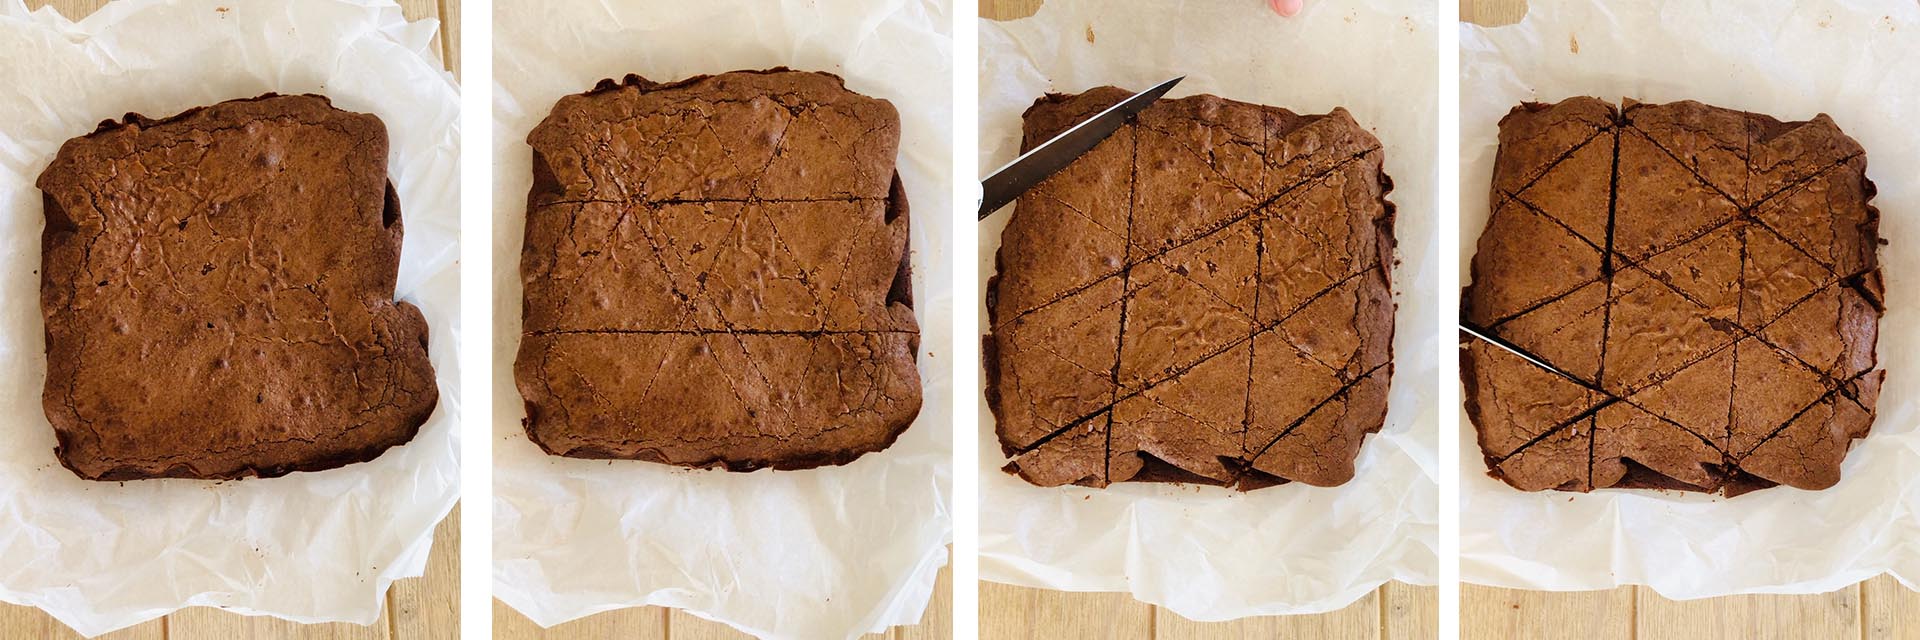
Make sure that your brownie has completely cooled down before cutting and frosting it. The cuts will be more sharp if the brownie is cool, or even chilled and in case that your brownie is still warm when frosting it, the frosting will start melting on top of the warm brownie. For cutting the square brownie into triangles first cut it in 3 equal stripes, about 6 cm (2 23/64 inch) each (2 horizontal cuts). Then make 3 diagonal cuts (45°, from bottom left to top right). Finally make 4 diagonal cuts (-45°, from top left to bottom right). The final cut will return a small piece of the upper right corner. If needed, trim some triangles (if they are not perfect) to get the wanted result.
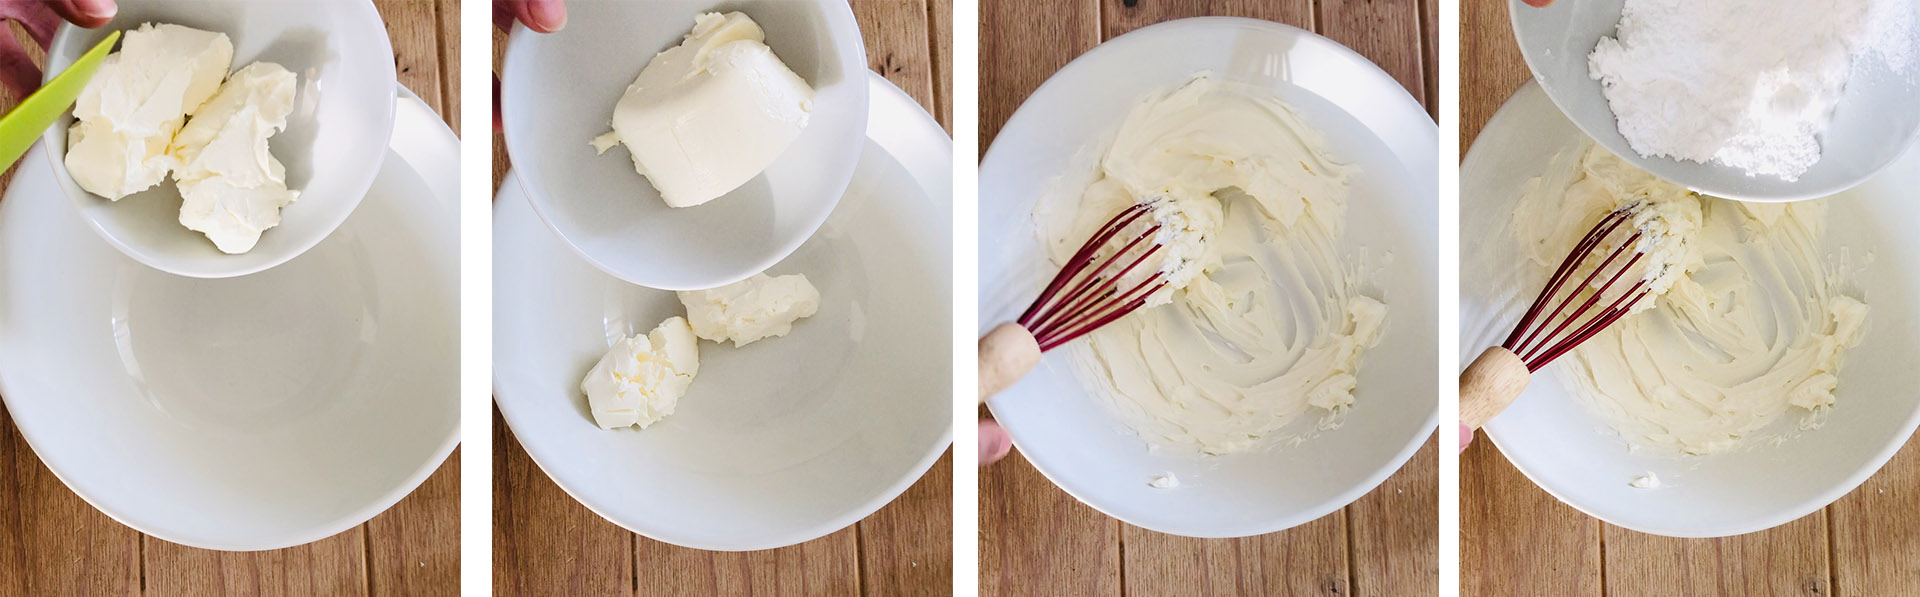
Regarding the frosting I choose my favourite white frosting, the cream cheese frosting. My reach cream cheese frosting consists of cream cheese, mascarpone cheese and a little bit of confectioners sugar to sweeten it a little bit and make it more stable for piping. Even if i love cream cheese frosting, I find it very tricky because it can become very quickly runny, and that is completely the opposite for a nice, reach and pipable frosting. Therefore I make sure that the cream cheese (also the mascarpone in this recipe) are chilled from the refrigerator and not at room temperature and be careful not to over whisk or over beat it, else it becomes very soupy.
Add both the chilled cream cheese and the mascarpone in a mixing bowl and whisk until creamy. Add more than the half confectioner's sugar (but not all) and whisk just until combined, creamy and thick. Taste and add more confectioner's sugar if needed.

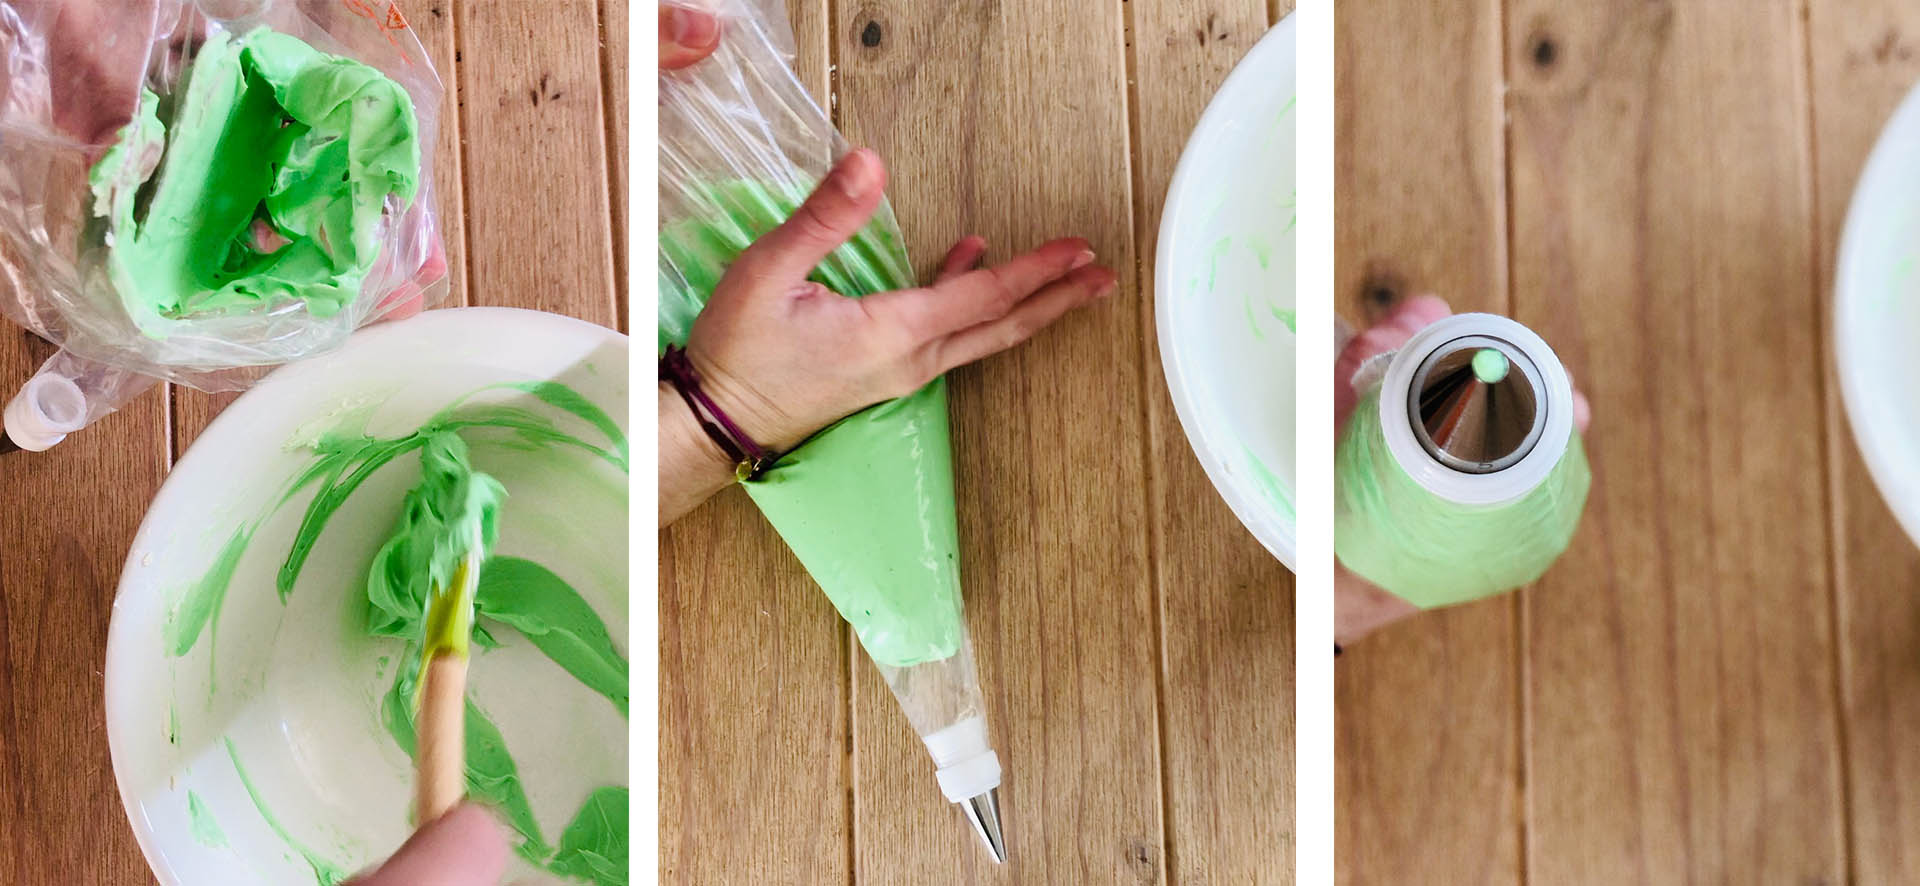
Add a small amount of green food coloring and whisk well until the color is uniform. Add more food coloring, until you get your wanted shade of green.

Transfer to a piping bag with a small circle tip or even without a tip. If you do not use a tip, make a small hole at the closed end of the piping bag with a pair of scissors.
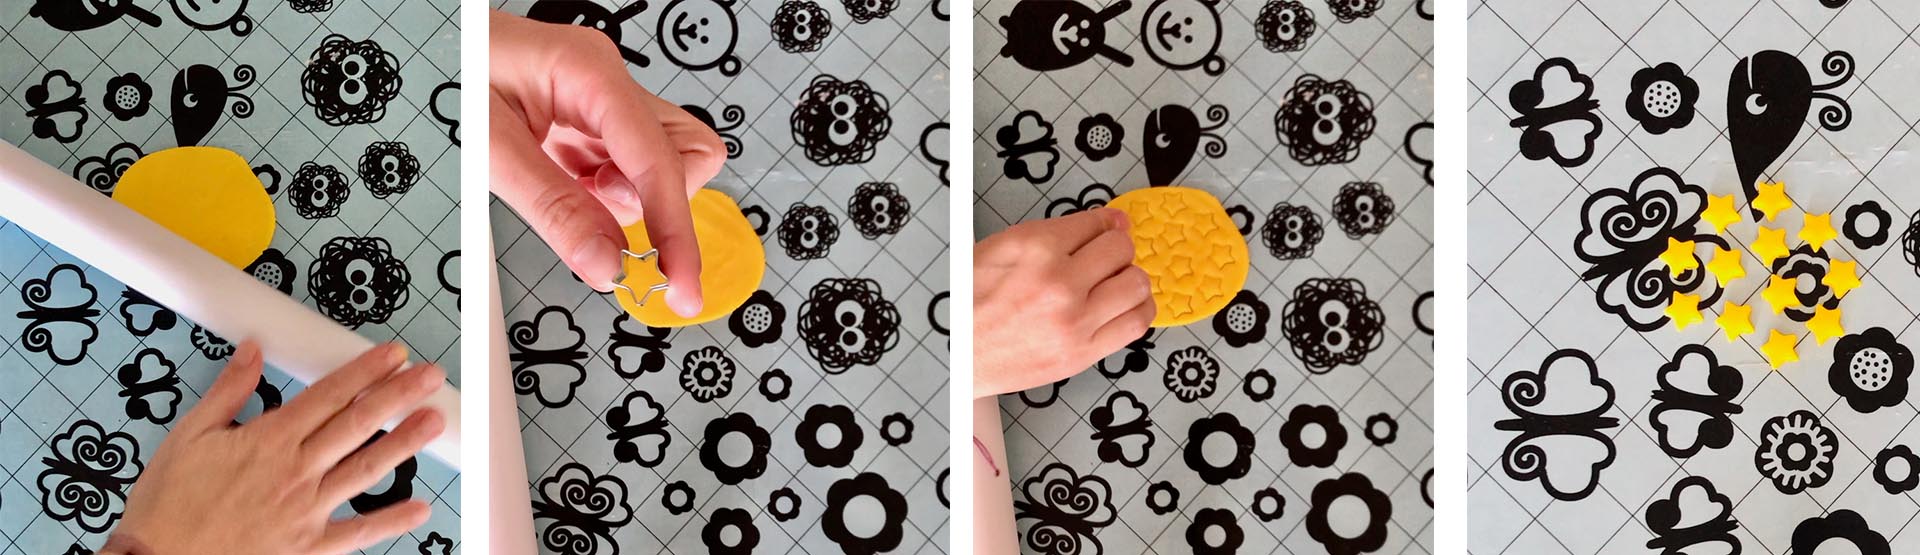
The fondant stars I made them by myself. I used golden fondant (you can use gold if you want, but I wanted to make it more cheerful). I took a small amount of fondant and soften it with my hands. I rolled it out until 2mm (1/16 inch) and cut small stars using a small star cutter. Then I let the stars to dry and harden at room temperature for an hour. (The photo below is from another recipe, but still the steps shown are exactly the same with the golden fondant).
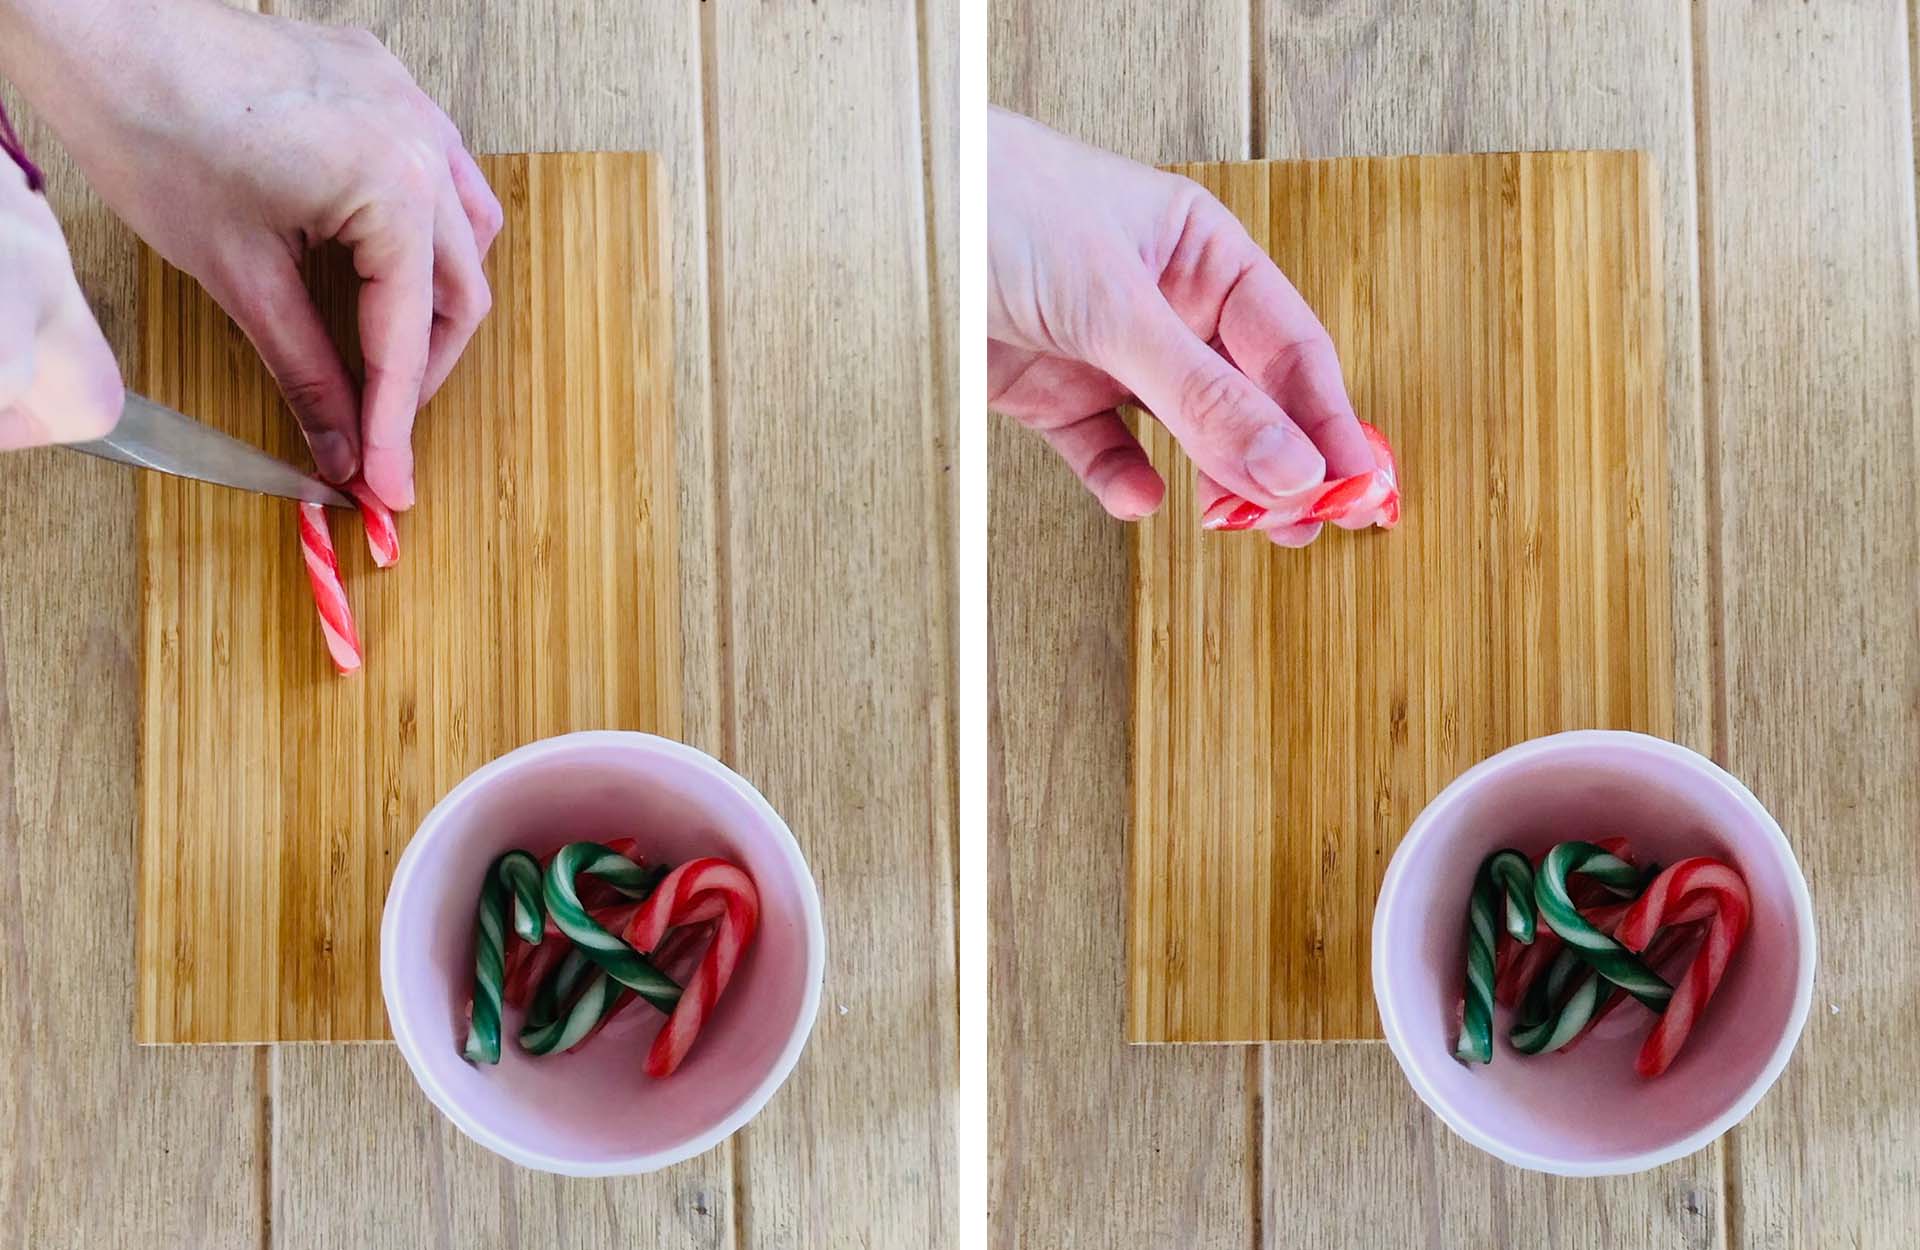
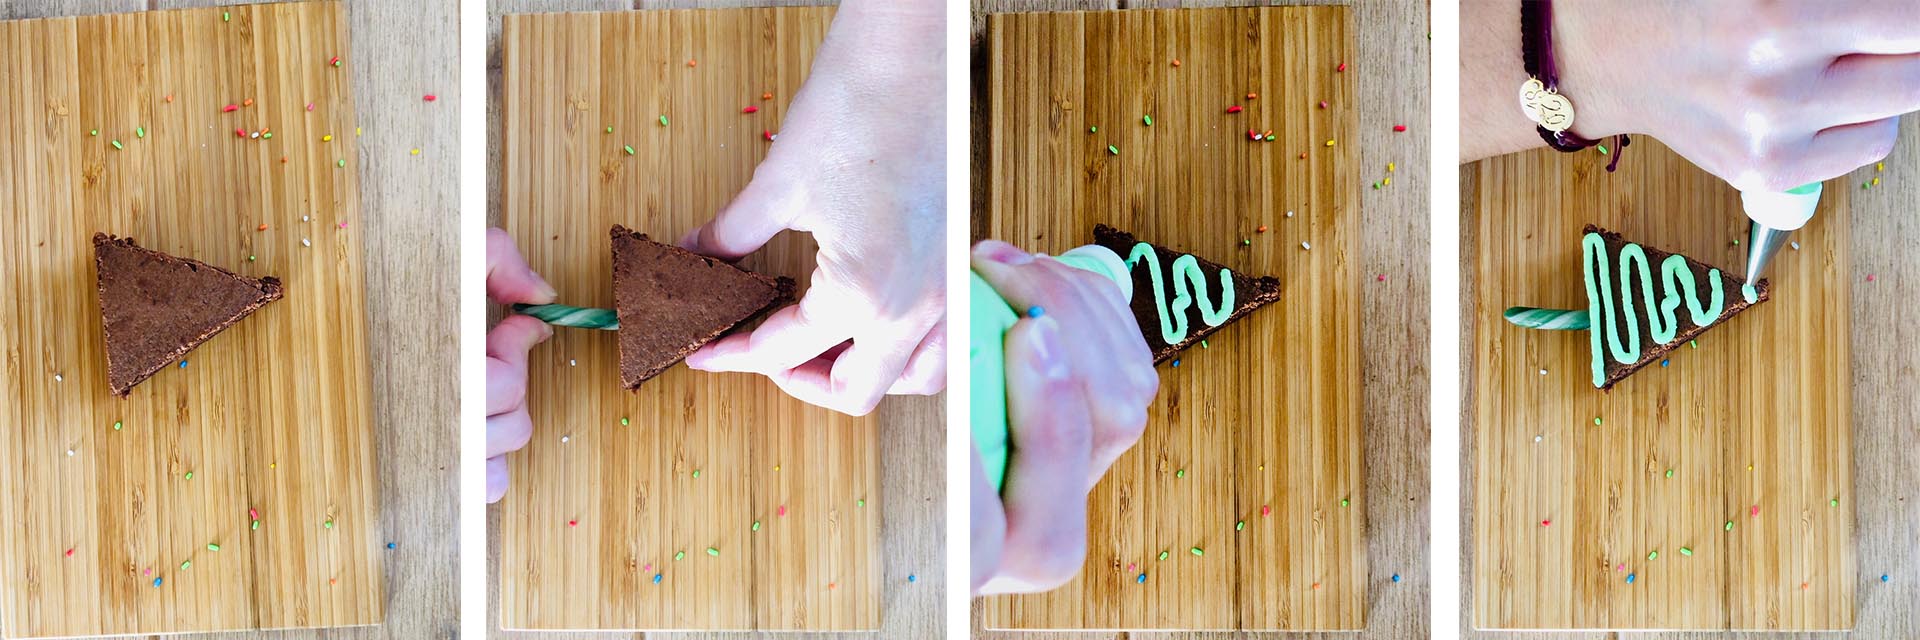
Next step, is to cut the curved top of each candy cane with a sharp knife, and be careful not to break it. Set them aside.
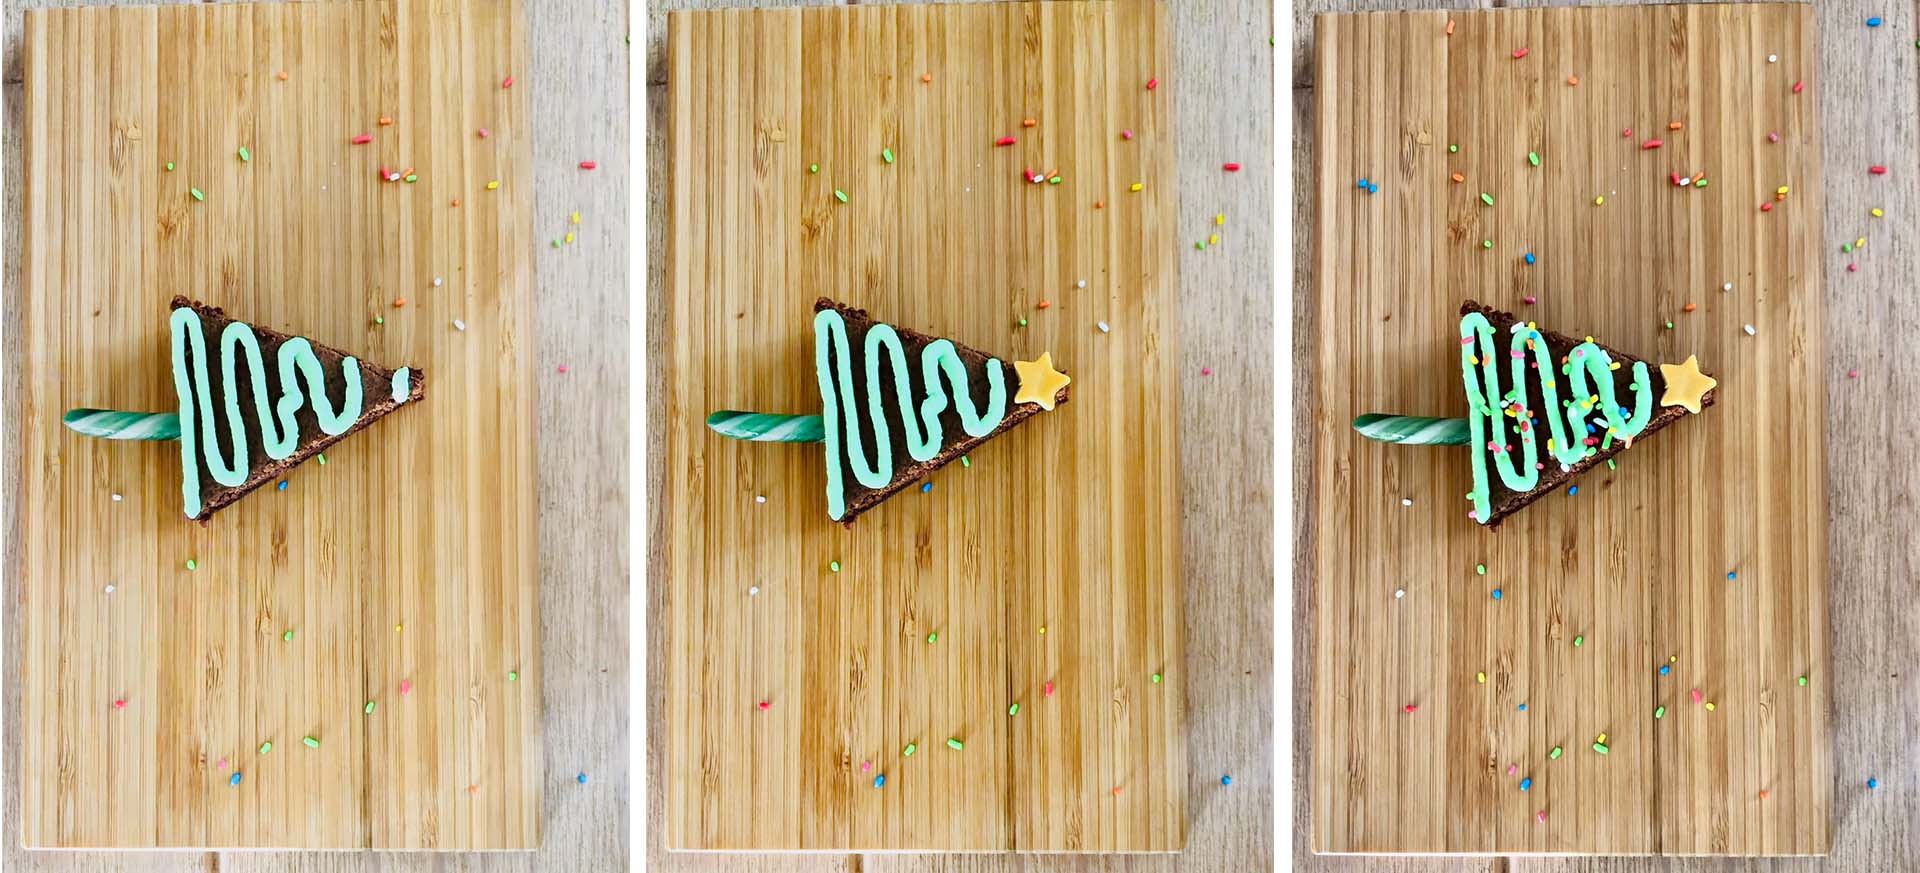
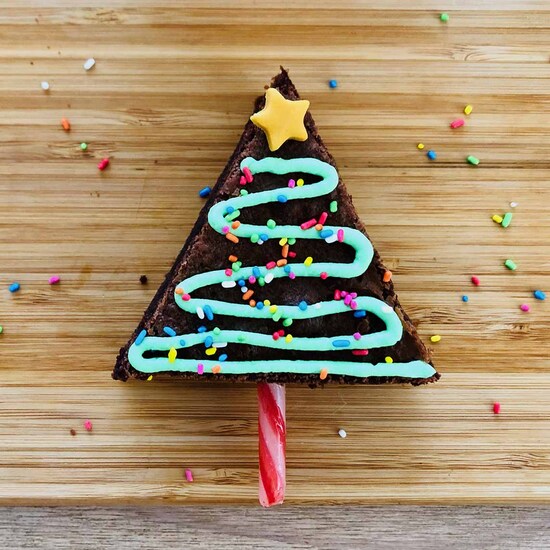
Now it is time to set the pieces together and form our brownies christmas trees! Start by pressing gently the sharper end of the candy cane into the bottom of the brownie triangles. Then pipe garlands on each brownie tree with the green frosting and a small dot on the top of the tree. Gently place one fondant star on the frosting top on the top of the tree and sprinkle the brownie christmas tree with sprinkles. Your brownie christmas trees are ready!
Enjoy them at room temperature. Store in an airtight container in the refrigerator for up to 4 days. (If using american buttercream other frosting without cream cheese, you can store the brownies also at room temperature).
Christmas Trees Brownies
You should login first in order to manage your favorites.
30'
Preparation Time
25'-30'
Cooking Time
14-16 christmas tree brownies
Servings
Ingredients
baked brownies square 20cm (8 inch)
70 gr cream cheese, chilled
70 gr mascarpone cheese, chilled
1/4 cup ( 30 gr ) confectioners sugar (powdered sugar), sifted
green food coloring
16 candy canes
1 tbs sprinkles
16 little fondant stars
Instructions
Bake your favourite brownie recipe in a square pan 20cm (8inch). You could add zest of 2 oranges and one teaspoon of cinnamon powder in the dry ingredients of the brownie, while making it, in order to bring the christmas flavour on. Remove the baked brownie from the pan and let it cool completely on a wire rack. Make sure that the brownie is firm enough and does not crumbles easily. Opt for a fudgy and chewy brownie for making these brownie christmas trees.
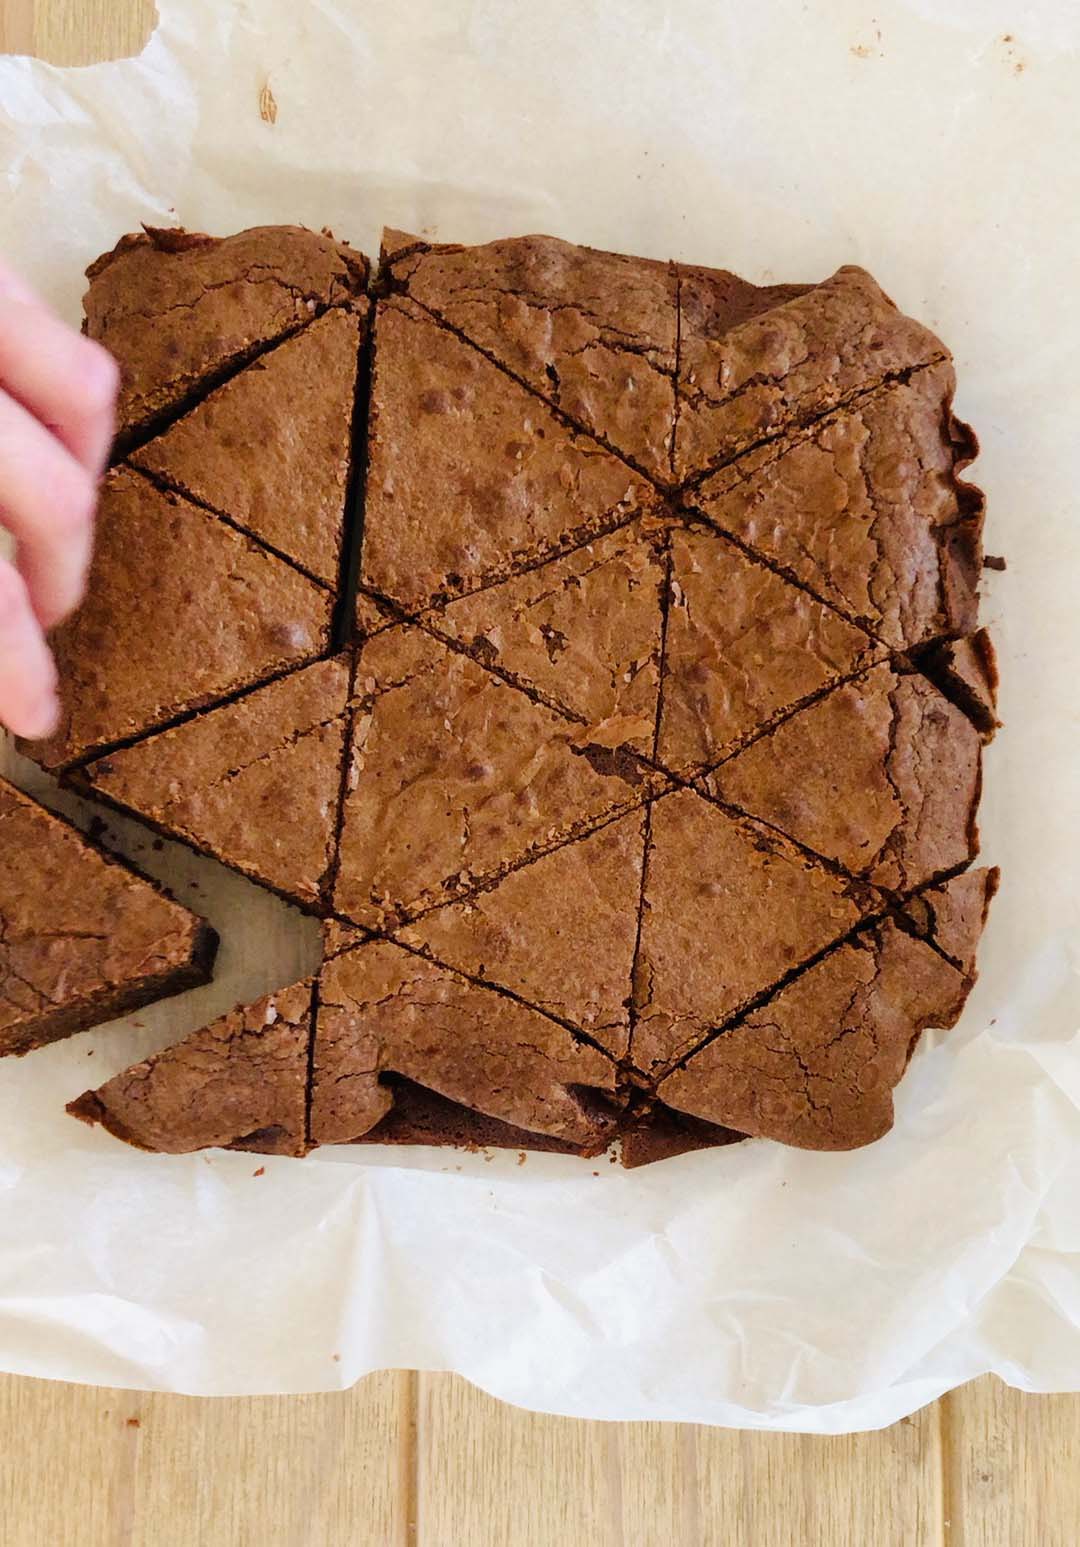
Once your brownie has cooled down completely, cut it in 3 equal stripes, about 6 cm (2 23/64 inch) each (2 horizontal cuts). Then make 3 diagonal cuts (45°, from bottom left to top right). Finally make 4 diagonal cuts (-45°, from top left to bottom right). The final cut will return a small piece of the upper right corner.
Trim some triangles, if they are not perfect, to get the wanted result.
Cut the curved top of each candy cane with a sharp knife, and be careful not to break it. Press the sharper end of the candy cane into the bottom of the brownie triangles.
In a bowl combine the cream cheese along with the mascarpone cheese and give a good whisk until creamy.
Add the sifted confectioners sugar and whisk until smooth. Add more confectioners sugar for taste or for thicker, more pipeable texture. Do not over whisk else the cream cheese frosting will become runny.
Add a small amount of green food coloring and whisk well until the color is uniform. Add more food coloring, until you get your wanted shade of green.
Transfer to a piping bag with a small circle tip or even without a tip. If you do not use a tip, make a small hole at the closed end of the piping bag with a pair of scissors.
Pipe garlands on each brownie tree with the green frosting.
Place gently a fondant star at the top of each brownie christmas tree and sprinkle with colorful sprinkles! Enjoy!
Store in an airtight container in the refrigerator for up to 4 days. (If using american buttercream other frosting without cream cheese, you can store the brownies also at room temperature).
0 Comments